Easy Backup
In this tutorial we’re going to find how to create a Powerhell script to automatically creare a .rar archive for backup.
Prerequisite
Platform: Windows 10
Software: WinRAR
Environment Variables
Before we start, you must add WinRAR to the system environment variables.
If you know how to do it, do it(if haven’t already) and go to the next section.
If you don’t know how to do it, don’t worry I’m going to explain it right now.
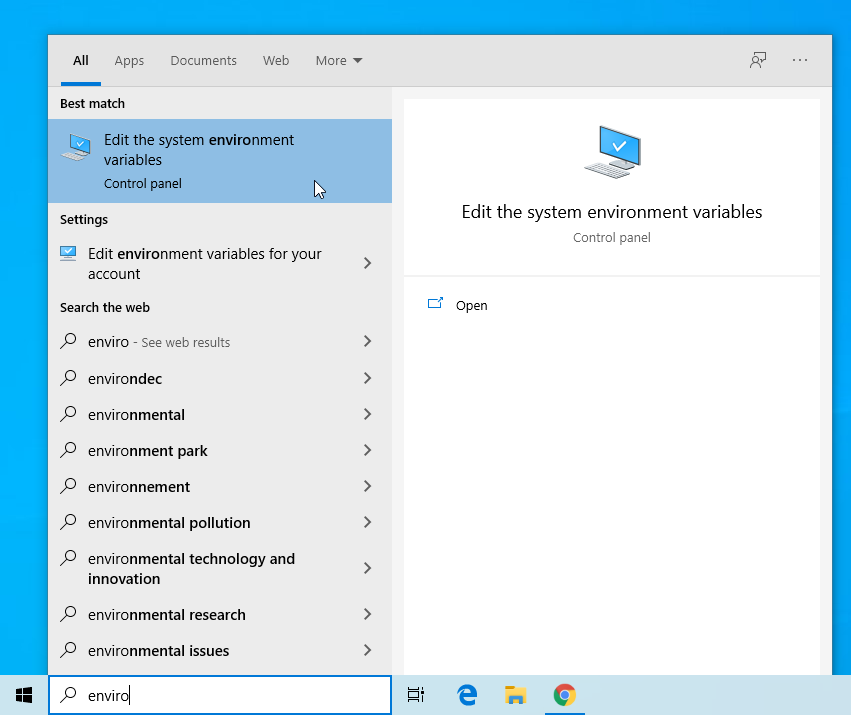
First, from the start menu search for “environment variables” and choose “Edit the system environment variables”.
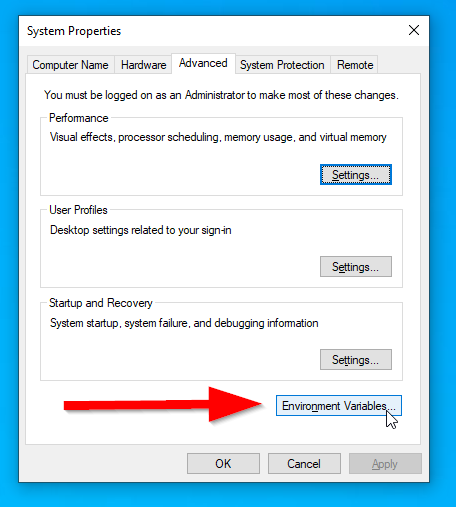
It will open a window, now click “Environment Variables…” form it.
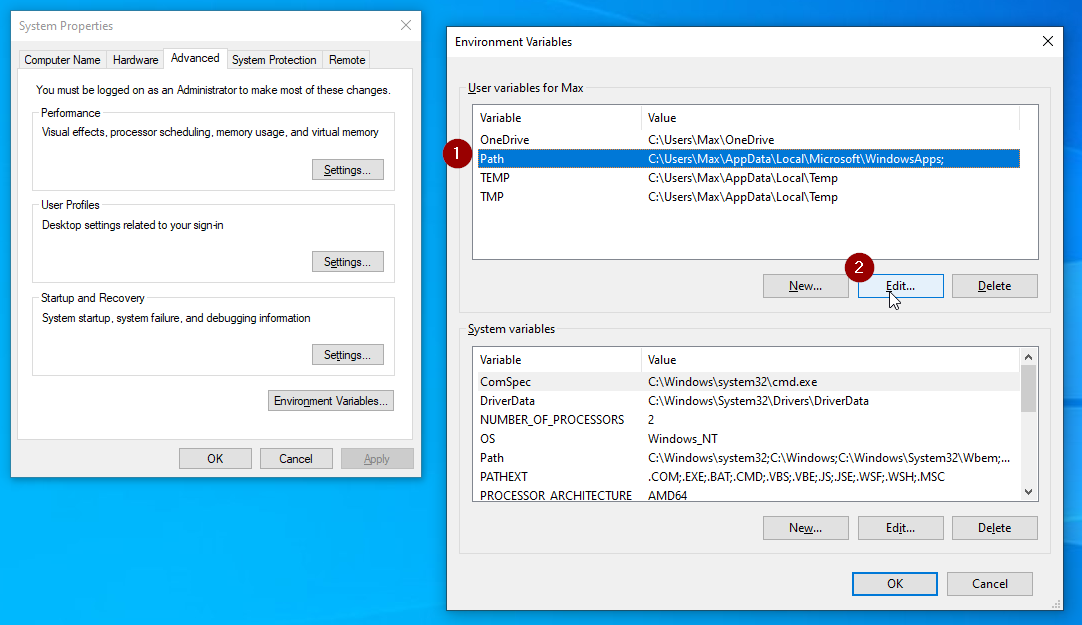
In this window choose the “path variables” and click “Edit…”.
Click “New”, it will let you edit a line of this window.
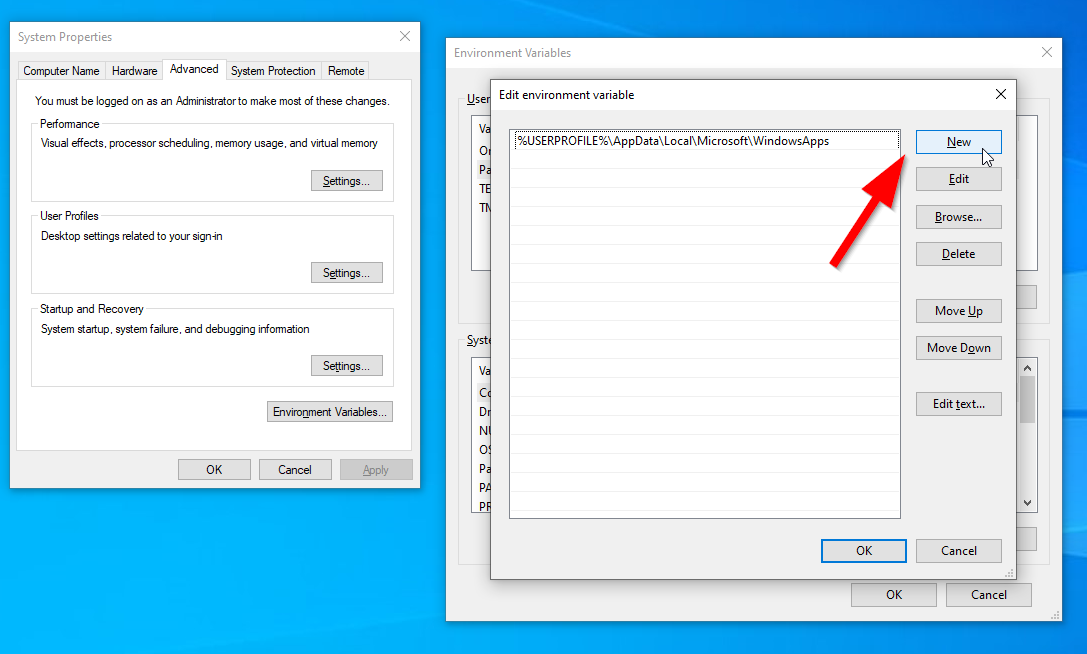
Now open WinRAR installation folder and copy its path.
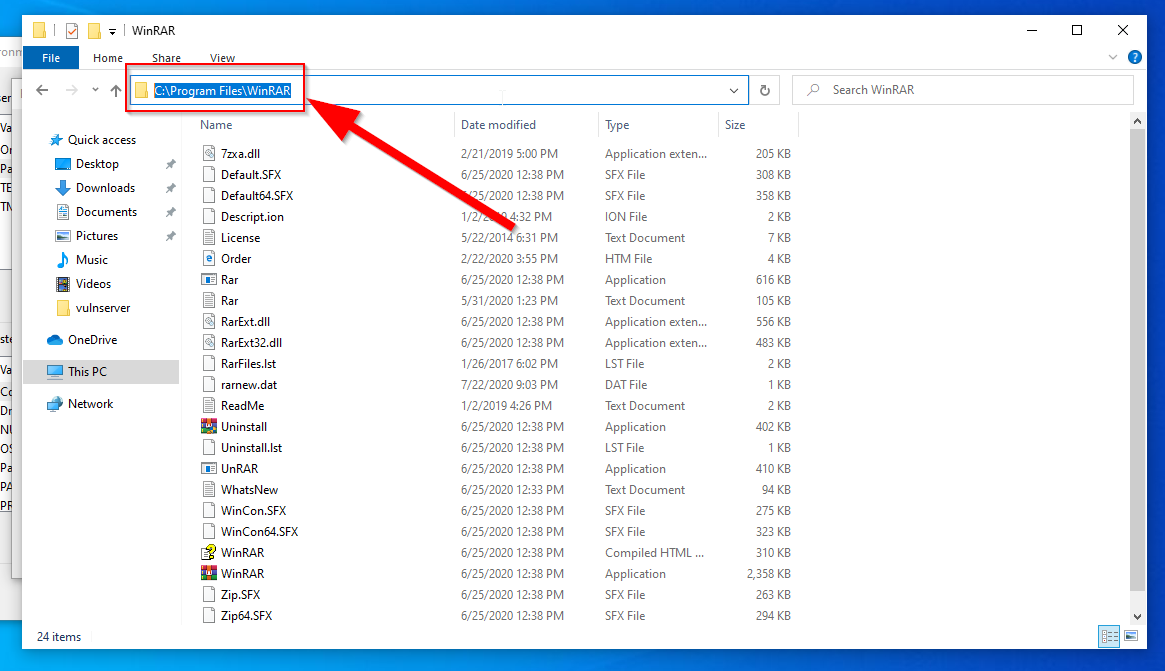
Paste it in the editable line of the window.

Well done! now you have assigned WinRAR to the environment variables, this allow you to call it from the PowerShell through the “rar” command.
If, in future, you have to make a new environment variable you know how to do it.
What are we going to do?
We’re going to create a script that, once put in a folder and executed, will create a .rar archive of every directory of the folder.
Then we can copy these archives were we want(USB, external HDD, ecc.) for backup purpose.
Why WinRAR?
Because I’ve always used WinRAR, it’s not open source I know, but it has a free trial, and it has a feature built in that we’re going to use, you’ll see later.
How we’re going to do it
First, let’s think about what the script must do.
It must find every directory inside the main folder.
For each of those it must create an archive and copy the directory inside it.
Seems pretty simple, and it really is, now we need to tell this to the computer, to do this we’re going to use the PowerShell.
You can create a PowerShell script using any text editor you want, even the notepad, just save it as *.ps1 and it will be recognized as a script, but Windows 10 comes with a PowerShell script editor pre-installed, just search for “Widnows PowerShell ISE”, it’s very useful.
The PowerShell script
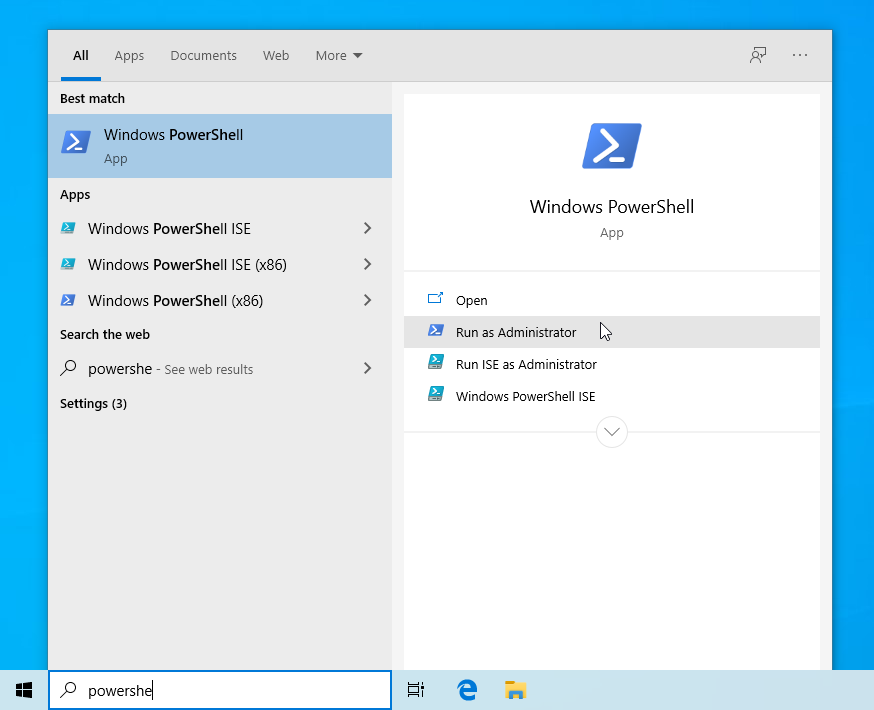
before writing any line of code we must change the execution policy(by default it will block any script).
To do that just search “powershell” from the start menu, run it as administrator and execute this command:
|
|
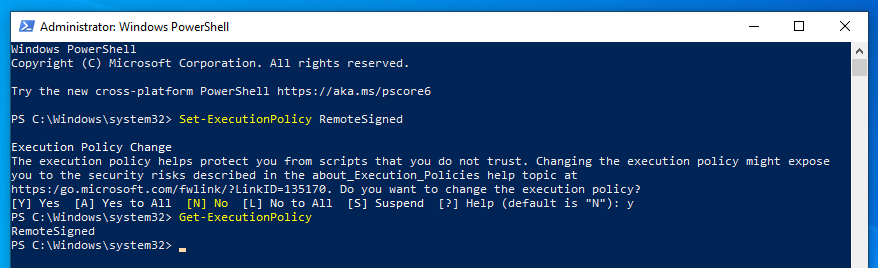
This allows you to run scripts created from your PC and scripts with a signature made by a trusted publisher.
The powershell script we’re going to make is pretty simple.
First, It must find every directory inside the main folder.
To do this we can write:
|
|
$d is a variable, I called it like this to remind me that is the directory variable.
dir is a default Alias for “Get-ChildItem”.
-Directory is a parameter, with this we’re telling to look for directories only.
What’s happening in this loop is that the vairable $d become the first item of the collection, in this case the first directory, then the code inside the { ... } is executed, then the variable $d become the next item of the collection, and so on until the collection si over.
The first step is done, now what we must do?
For each of those it must create an archive and copy the directory inside it.
The following code must be put in the “foreach” function.
First let’s give a name to the backup archive. To do it, we write:
|
|
So the backup archive name will be the name of the directory plus “Backup”, so if a directory is called “Cat” then the archive will be named “CatBackup.rar”.
Now let’s make the archive, to do so we’re going to do:
|
|
This will create the archive $arcName(that we saw earlier), and we’re putting a copy of the current $d directory inside it.
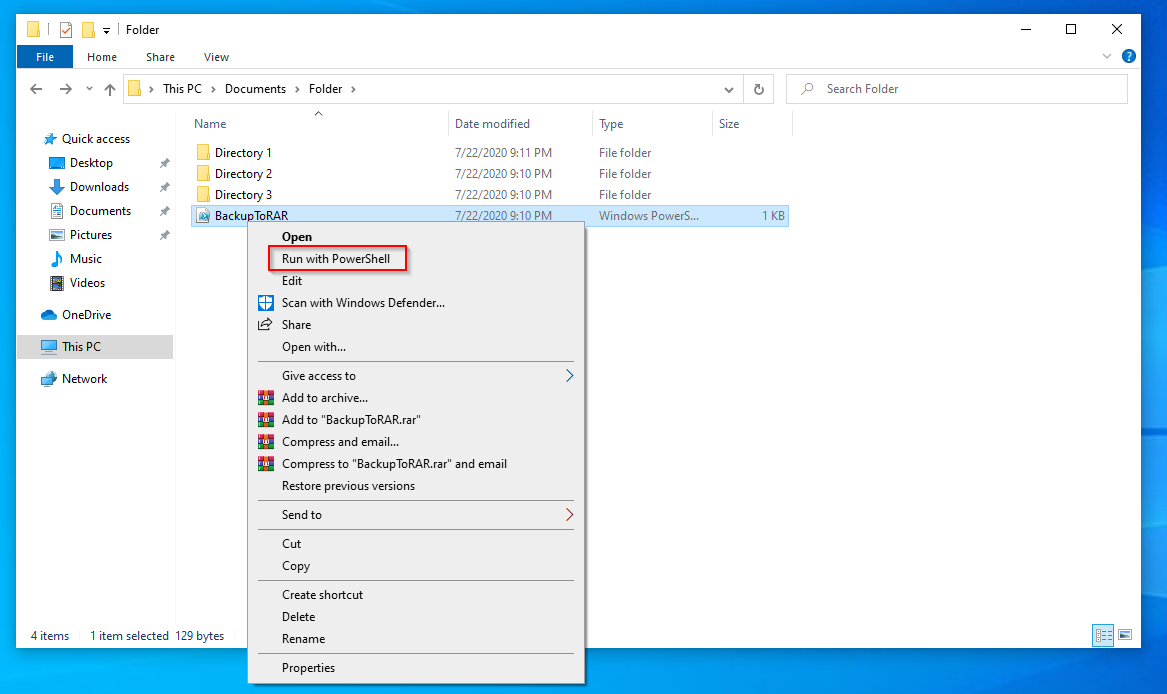
Now save the file(remeber .ps1), if you put the file inside a folder and you do right click “Run with PowerShell” it will create the backup archives.
If you execute the script it will open an CLI window and then it will close as soon as the execution of the script is finished, if you want to keep it open(for looking what is happening, or in case of any error) just add pause at the end of the script right after the }.
Now the script is fully functional, but we can improve it using a special feature of WinRAR.
Data Recovery
WinRAR has a functionality to let us add some recovery data to make possible repair a damaged archive.
To do that we add, inside the foreach loop, just after the part where we create the archive:
|
|
rr25p is composed by 2 part, rr means that he must add data recovery, 25p means that he add data recovery as big as the 25% of the total size of the archive(if you set “7p” it will make it the 7%), the bigger the number is the “safer” the archive is, but it will also increase its size, if you just write rr it will add a 3% of data recovery as default.
Now if you execute the script you will see, under the “Options” menu, the percentage of data recovery.
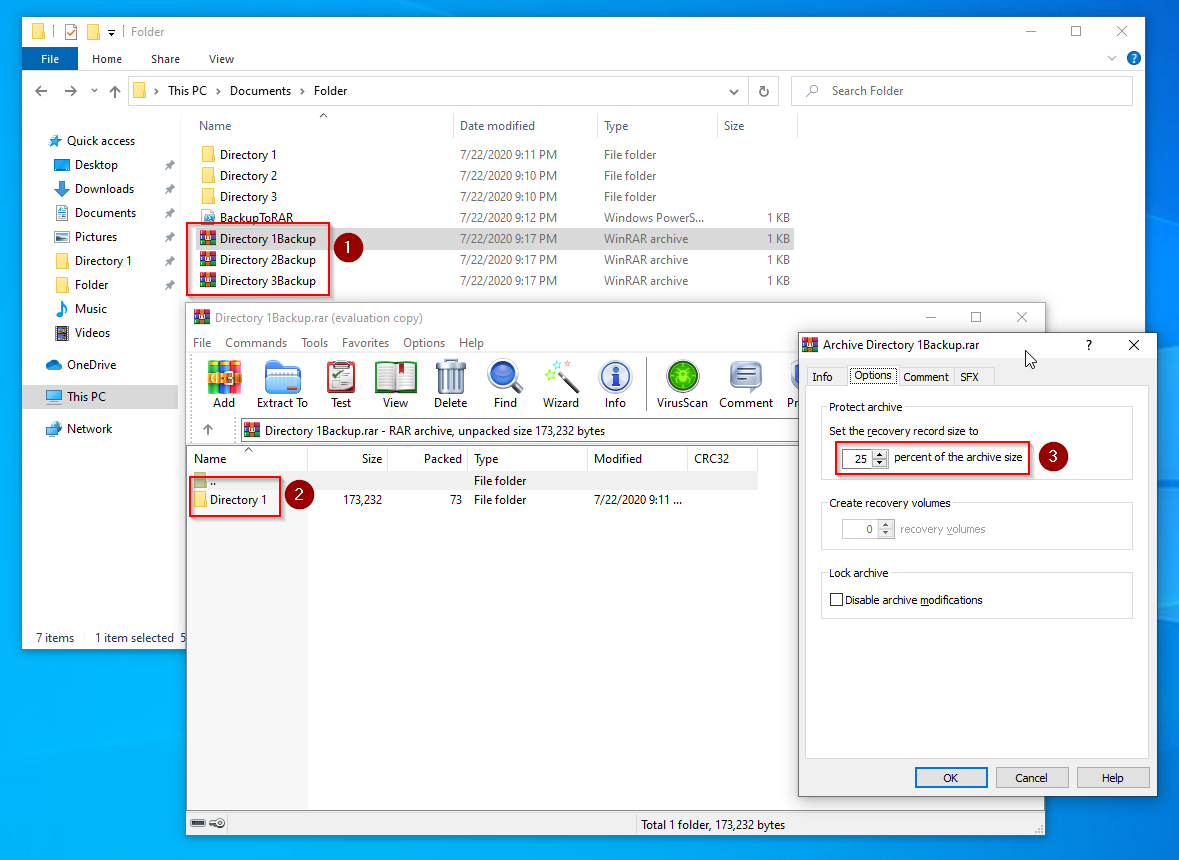
- The backup archives
- The content of an archive
- The percentage of data recovery
The Full Script
If you want to see what the full script look like here you are:
|
|
End
This was a very simple script, but it can be used as a base for a more complex one with more features.
I hope you found it interesting and/or useful.
Do you want to see more tutorials about PowerShell?
Is there any task that you want to automate or simplify using the PowerShell?
Leave comment on Twitter! @CodeSailer